Starting a new topic? Please try and put it in a relevant forum (Riding, Building, etc) but if you're not sure it's better to post in any forum than not to post at all. |
Wrapping bars |
Post Reply 
|
| Author | |
XAPBob 
Visitor (new) ")
Joined: 15 August 2018 Location: Warks Status: Offline Points: 51 |
 Post Options Post Options
") Thanks(0) Thanks(0)
 Quote Reply Quote Reply
 Topic: Wrapping bars Topic: Wrapping barsPosted: 05 November 2021 at 8:40pm |
|
On a flat bar bike, or something like an ICE/catrike there are a variety of moulded and other grips available.
On a drop bar bike bar tape is used from the ends to somewhere close to the stem. But in a velo with hamster or arrow head style bars... I find it comfortable to have my hands wrap around the middle of the bar, with a finger or two on the brake lever - and that bit isn't obviously easy to wrap via conventional means. What do other people do? https://www.recumbent.news/wp-content/uploads/2020/09/alve-henricson-quattrovelo-velomobile-13-1024x768.jpg That seems a bit scrappy in the middle, but it's hard to see with the finger in the way This looks *really* neat... I just can't quite see how it's done: 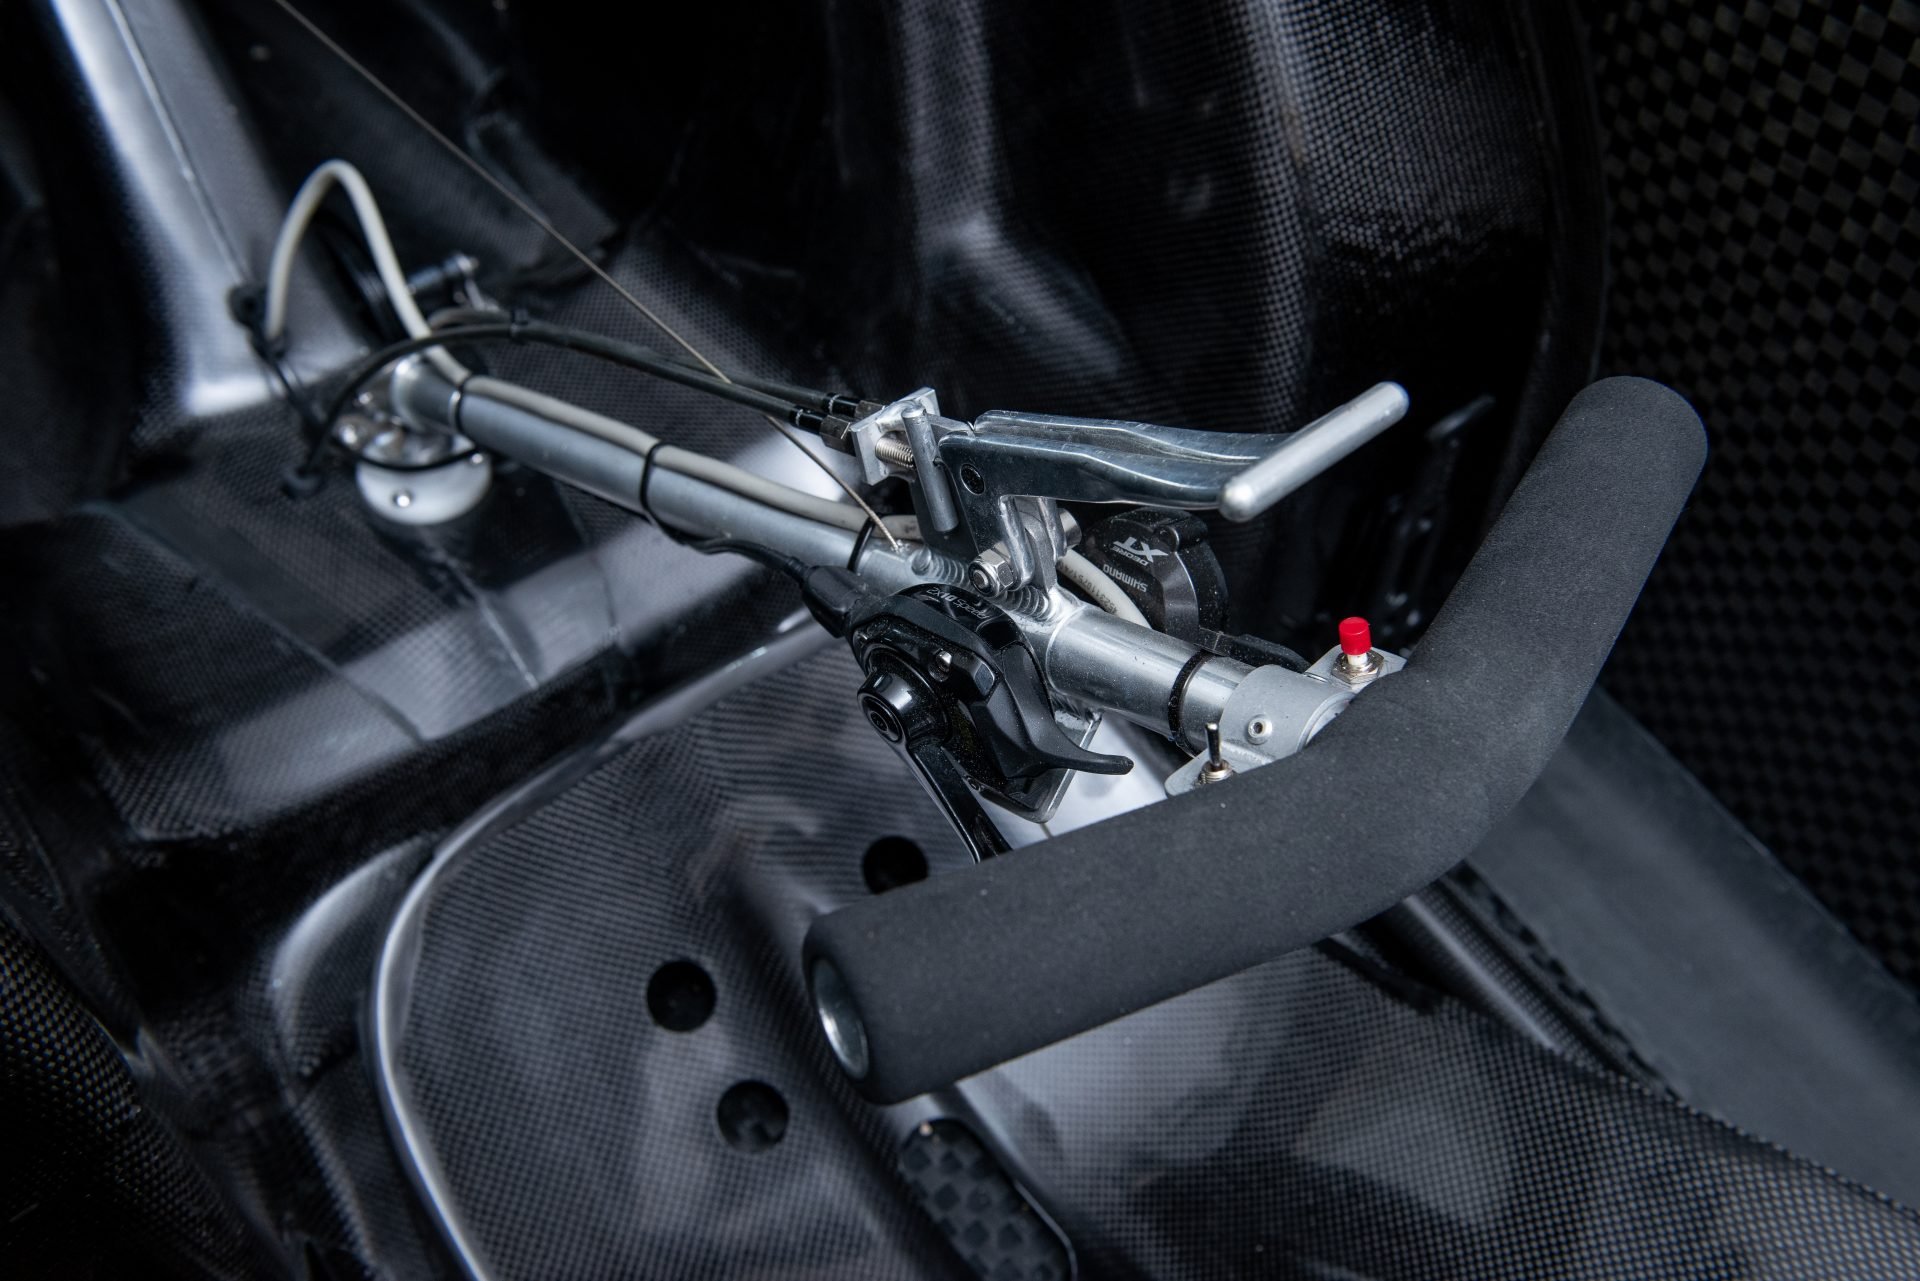 Edited by XAPBob - 05 November 2021 at 10:51pm |
|
 |
|
|
Yanto
Moderator Group 

Joined: 11 July 2005 Status: Offline Points: 1521 |
Post Options
Thanks(0)
Quote Reply
Posted: 06 November 2021 at 6:39am |
|
That's simply two pieces of foam tubing pushed on and butted together (the join can just be seen), little cut out to allow it to go around the downtube. Most have grip shifters so not as neat as that.
|
|
|
|
|
XAPBob
Visitor (new)
Joined: 15 August 2018 Location: Warks Status: Offline Points: 51 |
Post Options
Thanks(0)
Quote Reply
Posted: 06 November 2021 at 1:08pm |
|
No clever trickery around the join then, I just didn't expect it to be able to stay so flush around the centre.
|
|
|
|
|
Yanto
Moderator Group
Joined: 11 July 2005 Status: Offline Points: 1521 |
Post Options
Thanks(0)
Quote Reply
Posted: 06 November 2021 at 1:23pm |
|
No just carried out many times at the factory, I'm sure there will be a cutting guide/jig to ensure a neat finish.
|
|
|
|
|
XAPBob
Visitor (new)
Joined: 15 August 2018 Location: Warks Status: Offline Points: 51 |
Post Options
Thanks(0)
Quote Reply
Posted: 06 November 2021 at 9:04pm |
|
I'll take a couple of efforts to get something nowhere near then ;)
Bought a pack of four foam covers, and they are just about long enough, I think, to do both sides (I have a shifter mounted on the far right of mine, so it won't be as neat, but it might get close (yeah right)) Edited by XAPBob - 07 November 2021 at 5:46pm |
|
|
|
|
Kim
Admin Group
Joined: 13 April 2018 Location: Middle Earth Status: Offline Points: 1256 |
Post Options
Thanks(0)
Quote Reply
Posted: 11 November 2021 at 6:10pm |
|
If you shop around you can buy foam grips in metre lengths (intended for butterfly bars), which is handy if you need to trim it to odd sizes.
Also, top tip: Isopropyl alcohol as a lubricant. Does the job, and evaporates completely, rather than drying out and waiting to provide unwanted lubrication when it gets wet (probably less of a problem inside a velomobile, admittedly).
|
|
|
|
|
XAPBob
Visitor (new)
Joined: 15 August 2018 Location: Warks Status: Offline Points: 51 |
Post Options
Thanks(0)
Quote Reply
Posted: 11 November 2021 at 6:13pm |
|
I got a set of four from Amazon - just about long enough individually, I’ll try and post a pic later
(Not brilliant, but better than cradling cold metal)  You can see where I’ve had to add a half loop of foam underneath the gear indicator window - that’s the only “extra” bit, since a single cut does both sides (one bit of foam rotated by 180 degrees along its long axis. Edited by XAPBob - 11 November 2021 at 6:21pm |
|
|
|
|
Yanto
Moderator Group
Joined: 11 July 2005 Status: Offline Points: 1521 |
Post Options
Thanks(0)
Quote Reply
Posted: 12 November 2021 at 7:20am |
|
That'll work just fine

|
|
|
|
|
XAPBob
Visitor (new)
Joined: 15 August 2018 Location: Warks Status: Offline Points: 51 |
Post Options
Thanks(0)
Quote Reply
Posted: 12 November 2021 at 9:10am |
|
Trying to cut stuff that squishes so easily in a straight line is quite hard...
I imagine a hot wire cutter might be the way to go, but a fresh Stanley knife blade and a first attempt... not too bad. The "extra" bit it stuck on with some double sided foam adhesive tape (same as I am using to hold my LED strips on the outside - no doubt I'll post about that later as well)
|
|
|
|
|
Post Reply
|
|
| Tweet |
| Forum Jump | Forum Permissions You cannot post new topics in this forum You cannot reply to topics in this forum You cannot delete your posts in this forum You cannot edit your posts in this forum You cannot create polls in this forum You cannot vote in polls in this forum |


 Topic Options